How to Build: ICF Basement
98% of all basements in North America are built using some form of a concrete wall system. Concrete has been the material of choice for basements and foundations and will continue to be far into the future. By adding EPS (expanded polystyrene) plastic foam to the forming process insulating concrete forms or “ICFs” were created, making ICF basements a valuable part of any new home.
Why Build a Basement with ICFs?
Basements built with ICFs are not just inexpensive space for Heating systems, water heaters, and laundry tubs. ICF basements become recreation areas, Hobby rooms, offices or extra bedrooms. Because of the high efficiency of the thermal mass, your basement will feel warm in the winter and cool in the summer. Even if you just plan on a utility room, for now, you will have a “safe haven” in the event of a disaster. You will have the space available for expanding without the cost of adding more structure.
What is the cost?
If a typical foundation would be approximately 4 feet high, and a typical basement is 8 feet high how much more would it cost?
Excavating for a crawl space foundation: If the ground is flat, for instance, an excavator would dig about 2 to 2 1/2 feet of depth. By under digging you will be able to backfill the foundation with the soil that came out of the hole, raising the grade just slightly so that water sheds away from the foundation.
Excavating for a basement: Basement elevations can vary dramatically based on what the intended use and topography are. If the grade falls away and allows for a walkout entry that is a plus. Many of the new energy homes are incorporating the basement as everyday living space such as bedrooms and family rooms. This is often accomplished by elevating the basement high enough to have egress windows at grade level or by the use of window wells. Using the same criteria as above, flat ground, an excavator would dig 5 to 6 feet for an 8-foot basement. Remember, the deeper the excavation the more soil you will have to backfill with. You can add more soil if you are too high but if you set your elevation too low you have to haul away the extra soil or add to your foundation height. As you can see, with some planning, your excavation cost difference should be minimal
Footings: Cost for footings should be the same for a crawlspace or basement based on an average load bearing of the soil at 2000 psf (pounds per square foot).
Walls: 4 foot high for crawl space and 8 foot high for a basement. Almost but not quite that amazing. You will need an alignment system for the walls, and possibly a more detailed reinforcing layout due to added backfill height. Another consideration would be to add more height to the basement to allow for plumbing, ductwork, electrical and support beams to stay above the 8-foot mark. Still a bargain for what you are getting.
Basement Floor: If you are not doing a “mud cap” slab in your crawl space then a 4” thick concrete slab in your basement is an added cost.
Interior Finish: The EPS foam plastic insulation must be separated from the building interior with an approved 15-minute thermal barrier, such as minimum ½” thick regular gypsum wall wallboard. Thermal barriers must be applied in accordance with the current Intertek evaluation report. (IRR-1003).
See ICFs in action & learn more about building with icfs!
Foundation Drainage
Foundation drainage – the ability to evacuate hydrostatic pressure and groundwater up-surge – is a vital factor for a dry basement. BuildBlock recommends the use of the Form-A-Drain (“FAD”) foundation drainage system pictured to the right. A plastic lineal with slits on one side is covered by a silt cloth to avoid silting in the drainage system. The system is designed to form the footing and is inter-connected with PVC pipe to create an outside/inside french drain that stays in place without wasting or using wood.
This basement footing was specified to 18” in depth, so the trench at the bottom of the grade was dug 10” deeper than the 2×8 FAD lineals. The FAD profile used was 8” and built on top of the trench. Steel was placed and the lineal braced with FAD spacer straps.
On this job, the forms were wet-set into the wet concrete footing. Note the string-lines and the use of a form over a corner section to hold it in place as mentioned in the wet-set step-by-step instructions.
The drain was evacuated to daylight by gravity. However, the use of a sump pump would be the alternative if no daylight grade to drain was available.
A fine gravel backfill was placed to the top of the lineal after the first course was placed. Additional gravel was placed after the wall was built and poured to the height of at least one course of block. Note: Don’t forget to waterproof your wall before backfilling. See Section 6.4 for details.
Another layer of silt cloth was placed on top of the gravel before the backfill was placed after the walls were poured. The floor trusses were then placed to help support the walls.
Note: Never backfill basement walls until the floor system is in place to support the tops of all walls from moving in from backfill pressure.


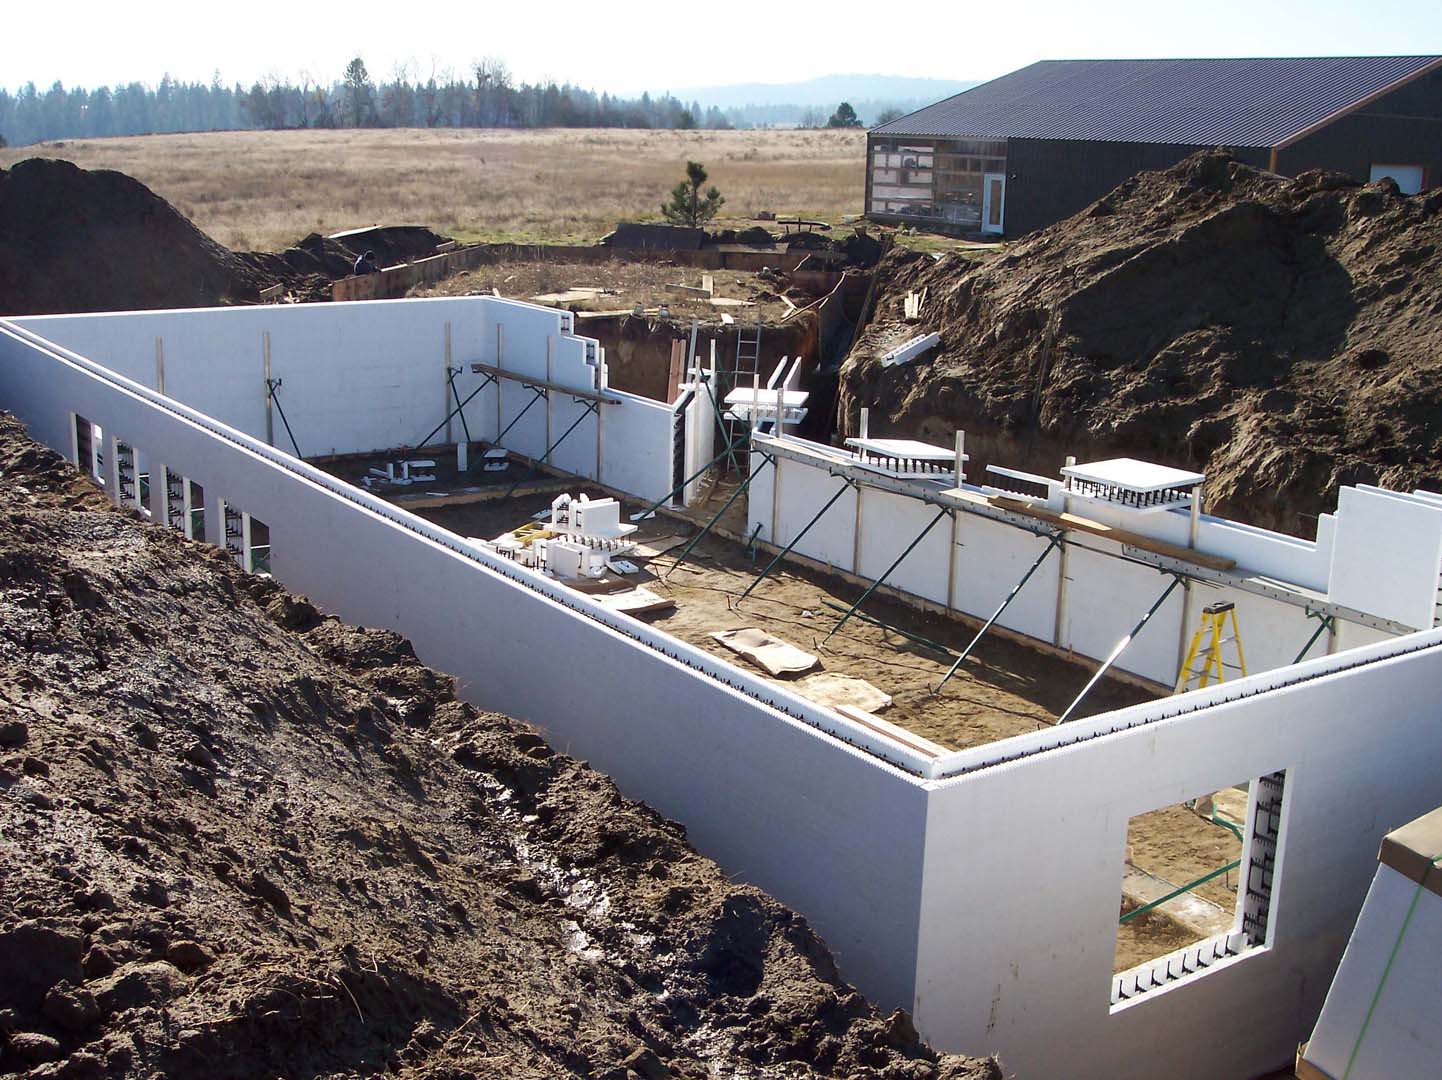
Stacking Basement Walls
Basement walls stack the same as above-grade walls. The main differences are: most likely the use of an 8” form* (versus 6” form most often used above-grade); a more closely spaced or larger size rebar schedule to handle the backfill pressures; and fewer windows to build.
Follow the same guidelines for wall stacking and apply your new rebar schedule. You may stack one course taller than your basement ceiling height to envelop your floor trusses. (See second-floor truss options in Section 5.2.)
Basement Wall Brick Ledges
If you plan to have a brick or stone veneer on your above-grade walls, then you need a bearing ledge near the top of your basement walls. BuildBlock has the solution in our easy-to-use 6” (BB-6BL) and 8” (BB-8BL) brick ledge forms. Use BuildBlock’s brick ledge form for more than just basements. Here are some other ways our brick ledge forms can be used in your projects:
-
Below a pier and grade beam foundation (See CAD Detail 26.)
Easily adapt our brick ledge to make inside or outside corners. Cutting marks are located on top of all brick ledge forms to help you. (See CAD Details 41-44.)
Let Us Help
Contact BuildBlock today and let our staff answer your questions and help make your project a success.