How to Build: ICF Walls

First, stack BuildBlock ICF Forms to the intended “top of floor height”. Then, decide if you will top mount or side mount the BuildDeck system to your ICF or other wall systems. This will determine the height you will cut the interior panel of the wall. Also, note that steel frequency may be increased in walls to support heavier loads as specified by the Engineer or construction plans/guidelines. Provide appropriate steel end length stub out from the wall if the above story is to be constructed in ICF.
After determining the mounting method for your floor system, use a laser level or construction level to mark the intended “bottom of floor” height. Bottom of Floor is determined by adding the depth of the deck system being used and the depth of the intended concrete cap. Subtract the sum from the overall height of the wall (top of floor height).
Once the ceiling or “bottom of floor” height is determined, first you will need to cut the interior wall panel to the appropriate height. The interior panel height may differ based on project design, needs or preferred installation practices. The goal is to make a smooth transition between the floor and wall systems.
When using the top mount method of installation, you will cut the interior panel flush at the “bottom of floor” level on all sides.
When using the side mount method, you will cut the interior ICF panels running parallel with the floor beam to 2.5” above “bottom of floor” height. (ref. sec. 4.4) The interior panels at the end of the floor beams can be cut to “bottom of floor” height + panel height, or “bottom of the floor” height + 2.5″.
You may make a template of the beam cavity profile, measure where your beams will line up in the wall and cut the end of wall panels in advance to match the beam cavity profile. Alternatively, you can place floor panels and come back with an ICF saw to cut excess foam away from the beam cavity to match beam cavity profile.
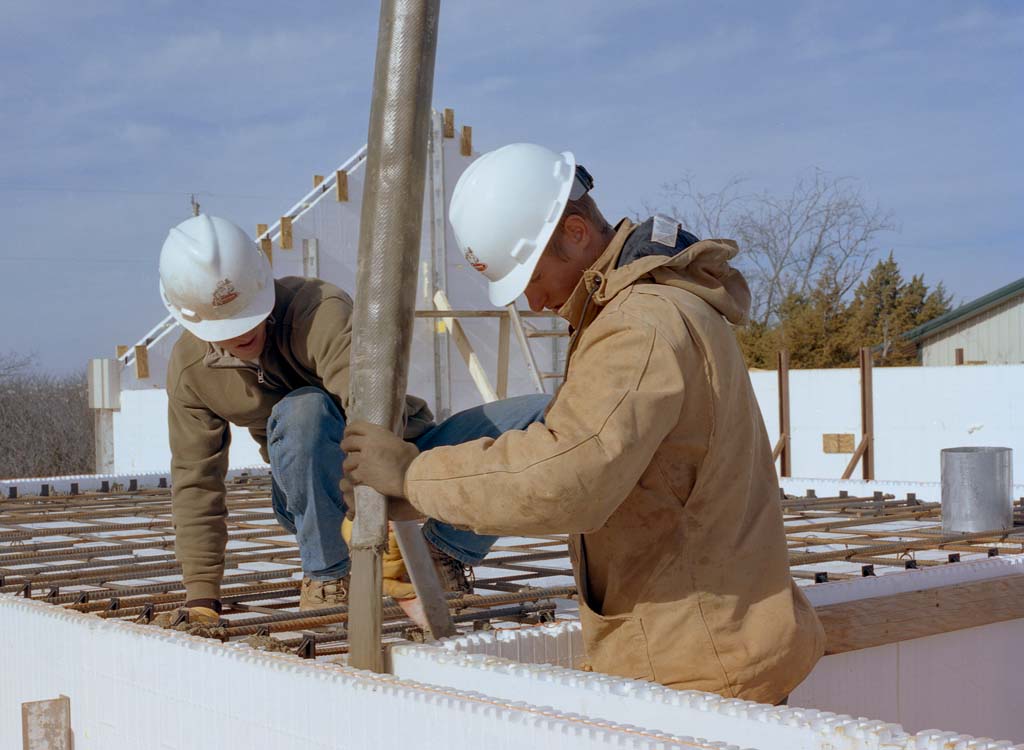
For our example structure, we will use the side mount method. As you can see in the picture, the sidewall and the end wall are cut to “bottom of floor” + 2.5”.
In order to provide a sheetrock attachment point (if necessary) around the perimeter of your intended ceiling (bottom of the floor), install standard light gage 2”x2” utility angle at the marked “bottom of the floor” height. Next, attach the utility angle to the BuildBlock webs 12” O.C. with #6 or #8 fine thread drywall screws (recommended), pan head screws as well as self-tapping sheet metal screws are also acceptable.
Certain applications may require the passage of drainage and plumbing pipes, electrical conduit, vent and HVAC plenums or various other utility items to pass through levels. Additionally, safe rooms will require fresh air vents that will connect safe room space to attic space.
Work with your Engineers, designers, and contractors to ensure that you know the proper placement of these items prior to pouring. First, cut a hole the appropriate size for the intended item and place the item or a sleeve or block out for the item into the decking system. Then, seal all edges with foam to foam, low expansion glue. Keep in mind that extra shoring may be required around penetration openings.
See ICFs in action & learn more about building with icfs!
Pre-Pour Checklist
Before you begin your build, each installer should have a Pre-Pour checklist. This is a living document of sorts that may grow and change based on project needs and personal preferences. A few items that will always be vital to check prior to pouring are as follows:
- Check all ICF bracing for proper setup
- Inspect or install additional shoring where needed
- Go over utility diagrams one last time
- Inspect all deck shoring for stability
- Ensure that all ceiling attachment strips are in place
- Inspect all steel, steel splices and intersections for proper installation and concrete embedment
- Verify concrete mix ordered
- Place additional shoring in any areas of concern
- All finishing tools are present – floats, shovels, vibrators, hand tools, trowels, etc.
- All accessories are present – anchor bolts, extra lumber