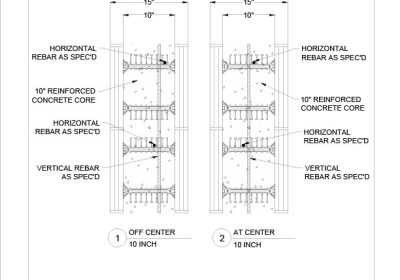
2.022 – BB1000 10 inch Reinforcing Bar Placement (DWG)
The following detail contains our 4 inch straight block adivising the position of the steel…
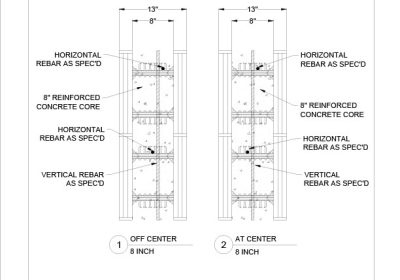
2.021 – BB800 8 inch Reinforcing Bar Placement (DWG)
The following detail contains our 8 inch straight block adivising the position of the steel…
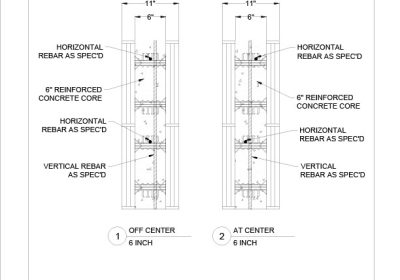
2.020 – BB600 6 inch Reinforcing Bar Placement (PDF)
The following detail contains our 6 inch straight block adivising the position of the steel…
2.020 – BB600 6 inch Reinforcing Bar Placement (DWG)
The following detail contains our 6 inch straight block adivising the position of the steel…
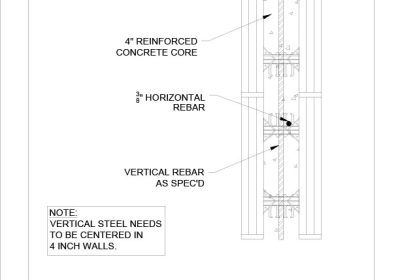
2.019 – BB400 4 inch Reinforcing Bar Placement (PDF)
The following detail contains our 4 inch straight block adivising the position of the steel…
2.019 – BB400 4 inch Reinforcing Bar Placement (DWG)
The following detail contains our 4 inch straight block adivising the position of the steel…
3.015 – BB1000 10 inch Haunched Slab on Grade Above Grade (PDF)
The following detail contains our 10 inch straight block with a haunched slab on grade,…
3.015 – BB1000 10 inch Haunched Slab on Grade Above Grade (DWG)
The following detail contains our 10 inch straight block with a haunched slab on grade,…
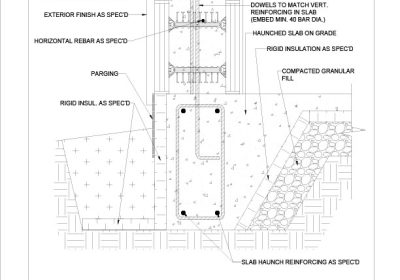
3.014 – BB800 8 inch Haunched Slab on Grade Above Grade (PDF)
The following detail contains our 8 inch straight block with a haunched slab on grade,…
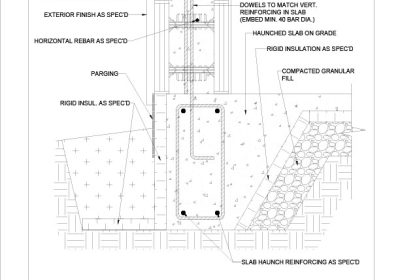
3.014 – BB800 8 inch Haunched Slab on Grade Above Grade (DWG)
The following detail contains our 8 inch straight block with a haunched slab on grade,…